EECS 183 Labs
EECS 183 Lab 2: Functions and Debugging
Lab due on your scheduled lab day (January 20 to 22)
Lab accepted for full credit until Monday, January 26 11:59 pm Eastern
Debug the code autograder direct submission link
In this lab, you are writing code and solving practice exam questions to master the use of functions, and to learn a new resource for finding bugs in your programs.
By completing this lab assignment, you will learn:
- To understand how to call and use functions.
- To be able to use the debugging functionality of your IDE to understand how the code you write is executed.
- To promote the use of this debugging functionality when completing your projects.
- To practice writing answers to exam questions and receive early self-assessment of preparedness for the exams.
Requirements
You should complete this lab in small groups of about 4 students.
IMPORTANT: For all labs in EECS 183, to receive a grade, every student must individually submit the lab assignment.
- Create a project using the
debugme.cppfrom the starter files, shown below. - Modify the debugme.cpp starter file with your solution to the lab with your peer group in the Lab Assignment.
- Submit your debugged debugme.cpp file to the autograder here
Starter Files
You can download the starter files using this link.
The IDE setup tutorials for Visual Studio and XCode include a video about how to set up a project using the starter files. You can access the tutorials here:
Lab Assignment
Debugging the Code
Now that you are familiar with the basic operations of the debugger, you can practice your new skills with buggy code. In this part of the assignment, you will start with a program that has several bugs. Use the debugger to find the bugs in the program and rewrite the code to eliminate the bugs.
NOTE: In fixing the bugs, you must not change the parameters for the given functions! The autograder will give you a score of zero if you do. This is the case for all Projects 1-4 in EECS 183. There are no compile errors in the code, only bugs that result in incorrect output.
-
Create a new project in Xcode or in Visual Studio. If you don’t quite remember how to do that, take another look at the Starter Files Section above.
-
Okay, so now that you have a new project, add
debugme.cppto your project from the Starter Files. -
Set a breakpoint at the statement to call the function
feedPet()in themain()function.
// set your first breakpoint on the following line
int newHunger = feedPet(careForPet, hunger);
-
Run the project. For input examples, see the Sample Runs Section below. The output of the buggy program will not match the Sample Run.
-
When the program stops at the breakpoint, use step into to follow the function call. Check the values for the parameters
hungerandfood. Are these values what you expected? If not, what could be the cause of the values not being as expected? You should be viewing the Locals window to see the values of the local variables for a function.
HINT: Look carefully at the values for hunger and food in the feedPet() function. This is your first bug to find. Remember, you cannot change the parameters for the functions you are given so you must instead change the statement in main() where this function was called!
- Now, step over the statements until you are just about to execute the return statement,
return hunger;. Is this the correct value? Check the RME (Requires, Modifies, Effects) comment at the top of the function. What do the Effects say?
HINT: Look carefully at the Effects of the RME and the variables and operators used in the feedPet() function.
This is your next set of bugs to find.
The use of the hunger and newHungervariables is not correct.
What should the assignment operation be to the newHunger variable?
Which variable should be used in the return statement?
-
When ready, step over the return statement, which will take your debugger back to the
main()function statement wherefeedPet()was called. In the Locals window of the debugger, you can see the values for all of the variables in themain()function along with the value returned by thefeedPet()function. -
Continue to step over statements, being sure to step into the statements with function calls. Check the values of variables to find where the statements are buggy.
-
Update your program until the inputs shown in the Sample Runs below match the specification and your debugged program.
-
Submit to the autograder to see if you found all of the bugs!
Sample Runs
Sample Run 1
TamagotchEECS Pet Simulator
Please enter pet name: Grumpy Cat
Please enter pet initial hunger: 100
Please enter pet initial happiness: -50
Please enter number to be used for feeding and petting: 50
After caring for Grumpy Cat, current hunger is: 50 and happiness is: 0
Thanks for using TamagotchEECS Pet Simulator! Good luck!
Sample Run 2
TamagotchEECS Pet Simulator
Please enter pet name: Taco
Please enter pet initial hunger: 500
Please enter pet initial happiness: 77
Please enter number to be used for feeding and petting: 42
After caring for Taco, current hunger is: 458 and happiness is: 119
Thanks for using TamagotchEECS Pet Simulator! Good luck!
Sample Run 3
TamagotchEECS Pet Simulator
Please enter pet name: Jabba
Please enter pet initial hunger: 7000
Please enter pet initial happiness: 100
Please enter number to be used for feeding and petting: -250
After caring for Jabba, current hunger is: 7250 and happiness is: -150
Thanks for using TamagotchEECS Pet Simulator! Good luck!
Sample Run 4
TamagotchEECS Pet Simulator
Please enter pet name: Punxsatawny Phil
Please enter pet initial hunger: 42
Please enter pet initial happiness: 42
Please enter number to be used for feeding and petting: 42
After caring for Punxsatawny Phil, current hunger is: 0 and happiness is: 84
Thanks for using TamagotchEECS Pet Simulator! Good luck!
How to Submit Debugging the Code
-
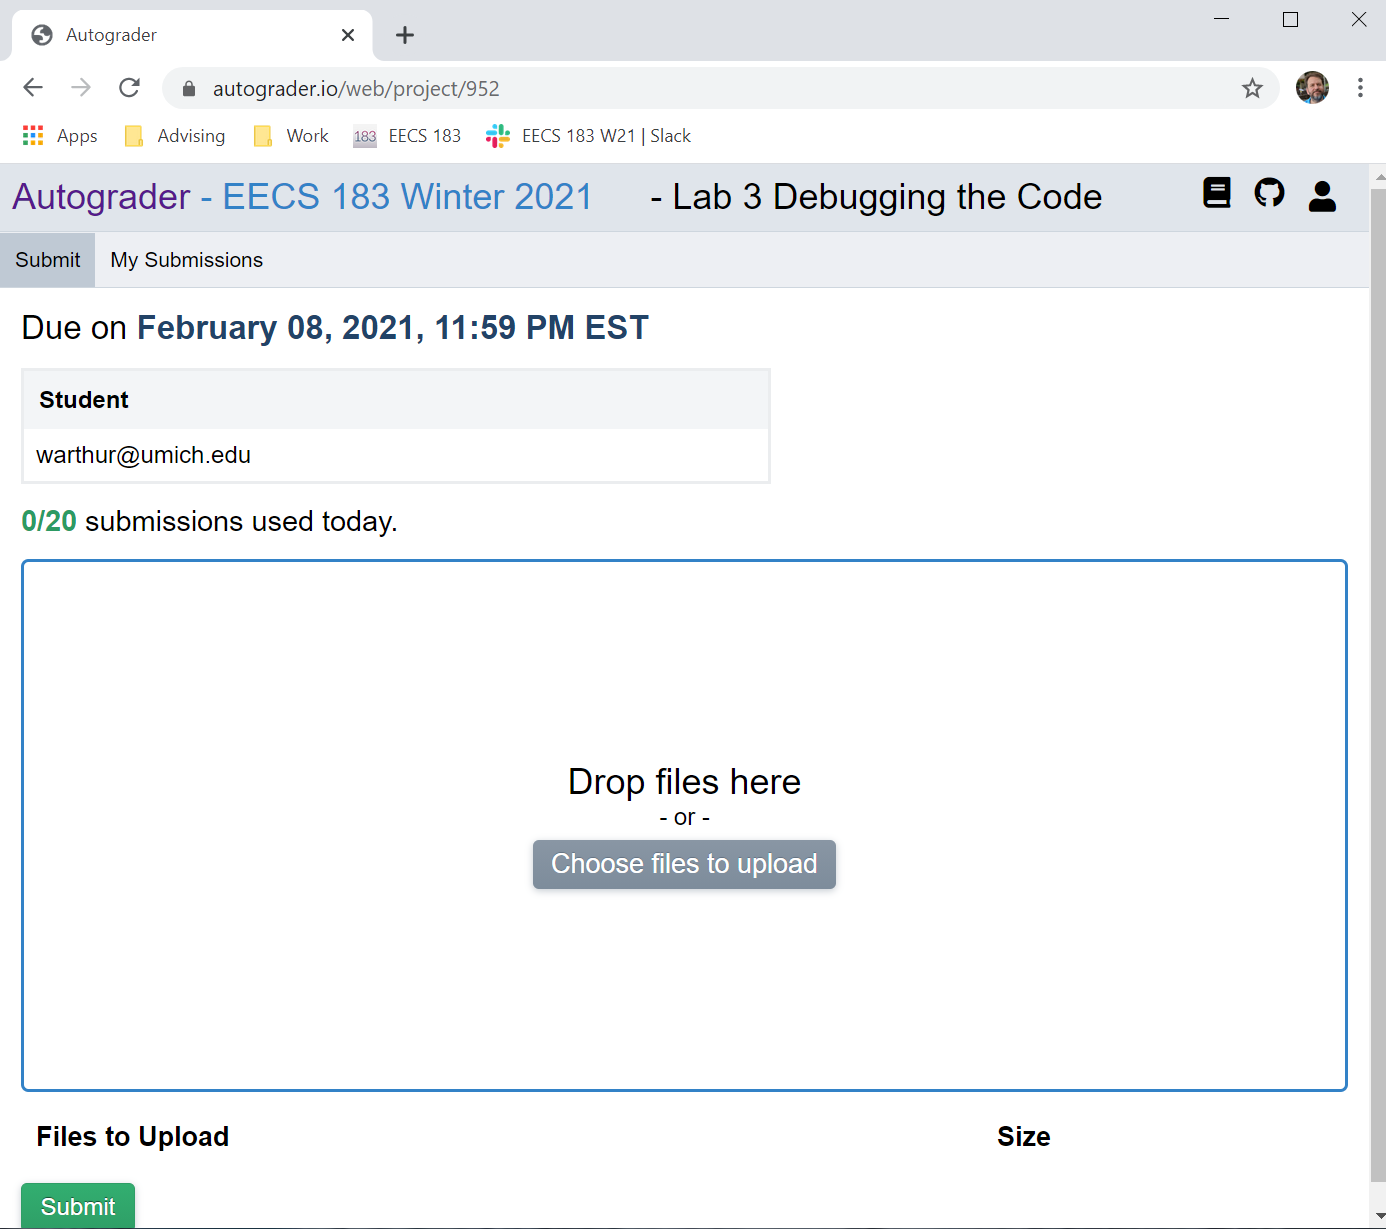
When ready to submit to the autograder, visit https://autograder.io/web/project/3565. You will submit your
debugme.cppfile which should contain your solution for this lab as one program. -
Drag and drop your completed debugme.cpp file to the box labeled Drop files here or select Choose file and navigate to your file. The file you submit to the autograder MUST be called
debugme.cpp.
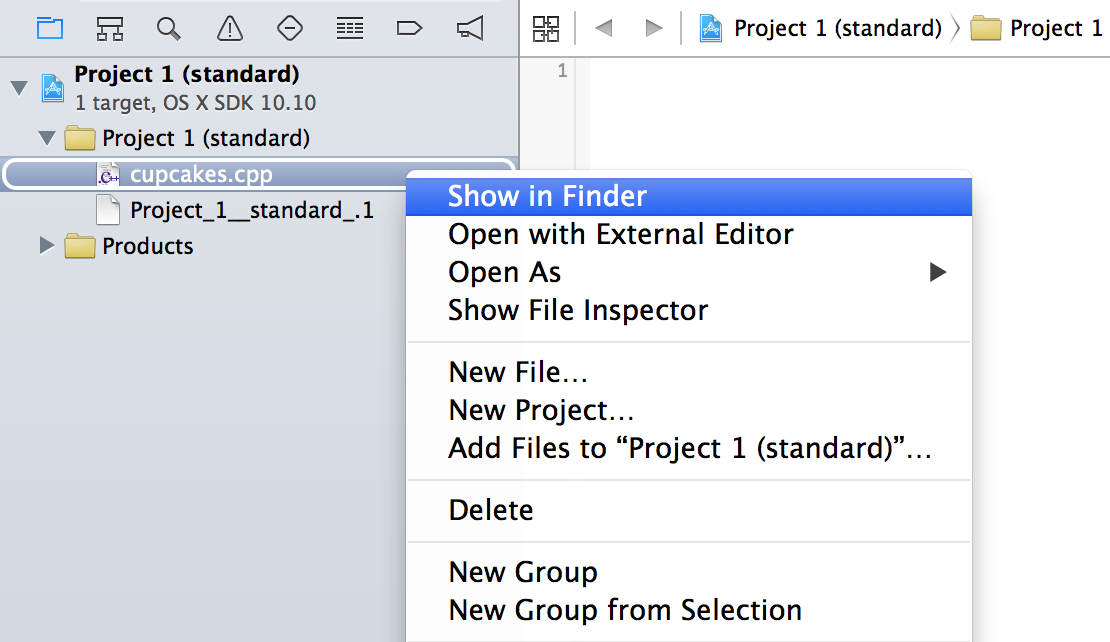
Note: If you’re using Xcode and don’t know how where exactly debugme.cpp is located on your disk, two-finger tap (or click while holding down the Control key) on the file in the Navigator area on the left side of the Xcode window and choose Show in Finder.
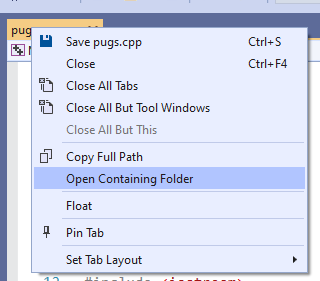
If you’re using Visual Studio and would like to know where debugme.cpp is on your disk, right-click on debugme.cpp (or two-finger tap) in the tab above the Code pane and choose Open Containing Folder.
- If confident that you’ve selected the correct file, click Submit to submit to the autograder. The autograder will tell you if you did not select a file with the correct name. We strongly urge you NOT to hit submit, but choose the correct file instead.
IMPORTANT: Late submissions for Labs will not be accepted for credit.
For all projects and labs in the course, we grade your highest submission score. In future projects, you will receive a limited number of submissions with feedback per day.
In projects in courses at Michigan, you receive very limited submissions with feedback per day, typically four times per day.
However, for this lab, you will receive ten submissions per day with feedback.
Once you receive a grade of 10 of 10 points for debugme.cpp from the autograder you will have received full credit for this lab.
Autograder Feedback
You can see the grade and feedback from your submissions by selecting My Submissions in the upper-left corner. Selecting a submission from the left tab will show the tests and feedback for the lab. When your submissions fail one or more tests, feedback about the test will be displayed. The autograder will show a line-by-line difference between the expected output for a correct solution and the output of your program.

IMPORTANT: Differences in blank lines will not cause your program to fail tests for this lab. There must be another reason for the test to fail, look closer.